Creating a gallery wall is a simple and inexpensive way to transform your space and incorporate pictures, artwork, and texture into the room. If you hate putting a nail into the wall, don’t worry – our fool-proof process will help you be sure the nail is going into the wall exactly where it needs to be. Here are our step-by-step directions on how you can create an eye-catching gallery wall around your TV.
Gather Supplies Needed for Creating a Gallery Wall
For this project, you are going to need:
- Scissors
- Hammer
- Tape Measure
- Level
- Pencil
- Tracing paper
- Nails
- Painters Tape
This project also poses a great opportunity to mount your TV. Not only will mounting get it up and off any furniture, it will also make the viewing experience more versatile. When considering your TV’s placement with the other gallery wall pieces, also consider its ideal height. Use our HeightFinder Tool to ensure it at the perfect viewing angle.
Collect the Items You Would Like to Hang
While your TV will be the focal point of your gallery wall, there’s usually ample space on both sides and above to make a statement and show off your style.
The first step is to begin collecting the items you would like to hang. We love incorporating pieces of artwork with photography, and even some three dimensional pieces to bring depth to the wall.
A gallery wall is a great opportunity to play with color and texture. Pick a variety of color shades that coordinate with the rest of the room or go minimalist and pick a monochrome color scheme. Have your wall tell a story of who you are or have a consistent theme.
Picking a Layout
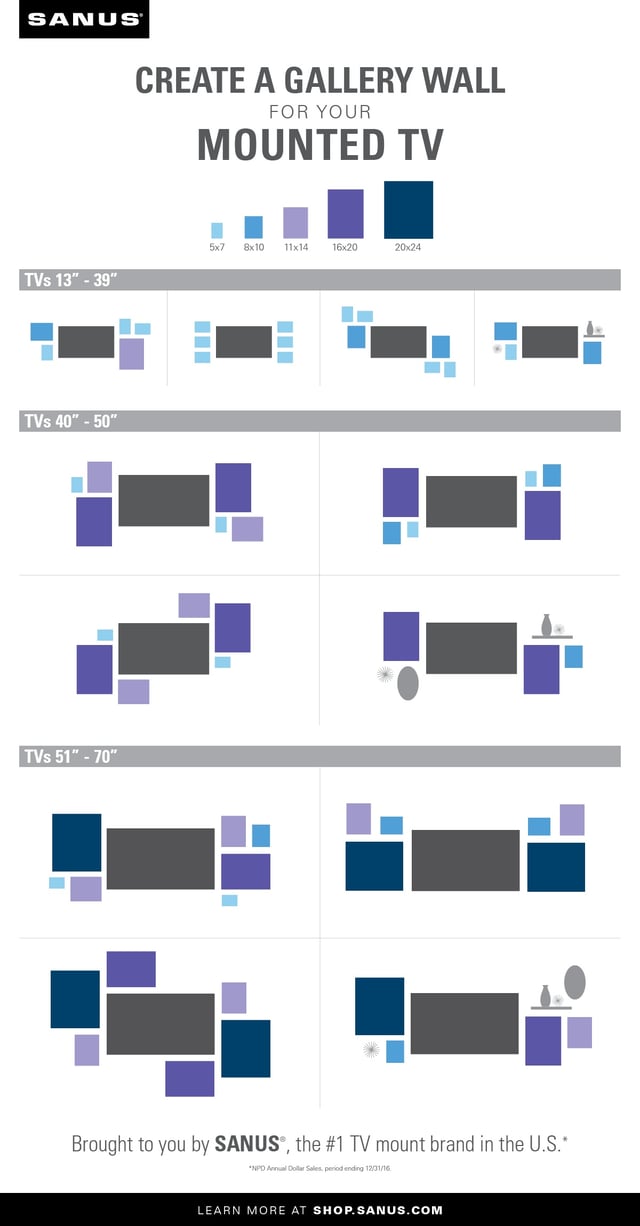
Once you have all of the items you potentially want to hang on your wall, the next step will be to create cutouts of each item. Make an outline of each frame or piece with the tracing paper and then use painter’s tape to play with the placement on the gallery on the wall. We recommend that you leave 3 – 6” of space in between each item. Refer to our TV gallery wall template below for some ideas on different layouts and be sure to check out our Pinterest page for some additional inspiration.

Once you have determined your layout, hammer a nail right through the tracing paper to get the placement exactly right. With just a few tools and some creativity, you can give your space a face lift in no time!


